
LeadPages is a great tool to create your opt-in pages to grow your email lists. What makes it even better is how easily it works with Infusionsoft. Here’s how to integrate Leadpages with Infusionsoft.
Leadpages with Infusionsoft
- Set up your Infusionsoft campaign the way you usually do – web form, tags, emails, etc. When setting up the web form you don’t have to create a fancy style the way you would when you put it on your WordPress site; just put in the fields you need (email, first name, last name, etc.).
- Obtain your Infusionsoft App Name and API key.
- Your app name is the first digits in your Insionsoft URL that appear before the .infusionsoft.com part (xxxxx.infusionsoft.com).
- For your API key go to the admin and settings section of your app.
- Select application on the left side menu.
- Scroll down and copy the encrypted key – the encrypted key is your API.
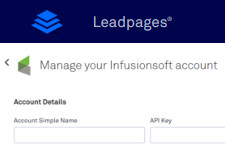
- Enter this information in the Leadpages account settings section; this action will link Leadpages and Infusionsoft together.
- Design the Leadpage.
- On the Leadpage go to the opt-in and choose edit.
- Next select integration settings on the left side.
- Choose Infusionsoft.
- Infusionsoft should now appear under the integrate form. Under using – select the name of your web form. If it does not appear, hit the reload button. It might take a few minutes for Leadpages to connect with Infusionsoft.
- In Leadpages you will now set up the design so the opt-in form for your page.
- Publish the Leadpage and test it.
That’s it! Follow these quick and easy steps and you’re all set.

